Let’s start at the beginning to understand how Office 365 CDN works in order to improve the performance in our SharePoint sites.
What is a CDN?
CDN means Content Delivery Network and in general terms is a network of geographically dispersed servers (also known as Edge Servers). The servers are located in different sites around the world. Each Edge server is caching static content like CSS, JS, images, etc..
How does it work?
As a user, if you make a request, the server closest in proximity to the user will deliver the content, ensuring the shortest distance for the data to travel, providing the best experience for the user.
Could it be useful for you?
Probably, you could have users in different countries, this will increase the latency and provide a poor experience of your site. Take a look to the following image where you can see this in action. The distance to the origin server is quite a lot, so a good option could be to use the Edge node to reduce the latency, reduce the distance and improve the load times.
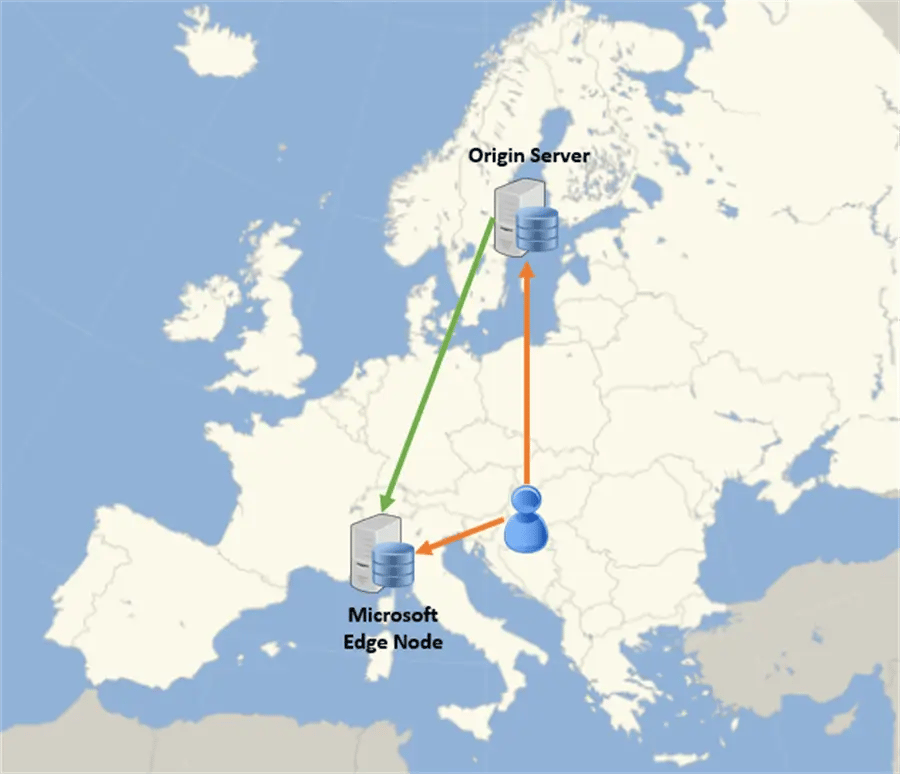
So we could say that definitely, Office 365 CDN could improve the performance of your site, the thing is to decide when it is required or not.
Please, take a look to the available Microsoft Edge nodes for Office 365 dispersed in the world.

How much does it cost?
CDN capability is included as part of your Office 365 subscription, so you don’t need to pay extra costs for this feature.
How can I work with my Office 365 CDN?
Office 365 CDN is not enabled by default, this should be enabled by the Office 365 administrators using SharePoint Online Management Shell.
Static assets exposed through the CDN are uploaded to the SharePoint libraries which are enabled as CDN origins, because of this, these assets can be accessed using CDN urls.
We can define origins like a location where the files are stored, for instance the default origins when enable a CDN are the master page gallery and the style library. Obviously, you could disable them and enable you custom locations as origins.
We have two types of CDN in Office 365: Private and Public
The difference between them is pretty obvious, private CDN will be available just for internal use, so just an authenticated user in the company could take benefit of this feature. On the contrary, the public CDN can be accessed by a user outside the company, the only requirement is that he needs to be in SharePoint context, you cannot call for instance an Office 365 CDN image from your ASP.NET application. So we could say that it’s very important to define what types of files should be exposed in each CDN.
Another important difference is that the Private CDN urls are dynamically generated by SharePoint Online and it will be generated if the user has read permissions to the CDN Origin, this could take some time before the change is done. Public CDN urls are static with the same structure and basically you could build them as they have the same format.
The key point of this is the Publishing Feature Auto-Rewriting feature. This feature helps people to use CDN features rewriting the urls automatically. Here you can check what is supported with Auto-Rewriting feature from official documentation.
- IMG/LINK/CSS in the classic publishing page HTML
- Content By Search WebPart assets (display templates, images in query results)
- Picture Library SlideShow webpart images
- SharePoint Image renditionsImage fields in SPList REST API
One important thing to make Auto-Rewriting feature works is that the assets shared from the CDN must have a major version published, if not, you could have under the impression that the auto-rewriting feature is not working.
In the following table you can check a list of PowerShell commands available to work with Office 365 CDN.
Commands with a brief description
- Get-SPOTenantCdnEnabled -CdnType Public / Private -> Get status of CDN settings
- Set-SPOTenantCdnEnabled -CdnType Public / Private -> Enable CDN
- Set-SPOTenantCdnEnabled -CdnType Public / Private -Enable $false -> Disable CDN
- Get-SPOTenantCdnPolicies -CdnType Public / Private -> Get configuration
- Set-SPOTenantCdnPolicy -CdnType Public / Private -PolicyType IncludeFileExtensions -PolicyValue “comma separated list of types” -> Define file types that can be hosted in the CDN
- Add-SPOTenantCdnOrigin -CdnType Public / Private -OriginUrl sites/cdn/cndlibrary -> Add new CDN origin to your custom library.
- Get-SPOTenantCdnOrigins -CdnType Public / Private -> Get list of CDN origins
- Remove-SPOTenantCdnOrigin -CdnType Public / Private -OriginUrl sites/cdn/cdnlibrary -> Remove a CDN origin